Category Archives: Troy’s Blog

What is Monopoly Traveler About?

Nat'l Parks Monopoly Board

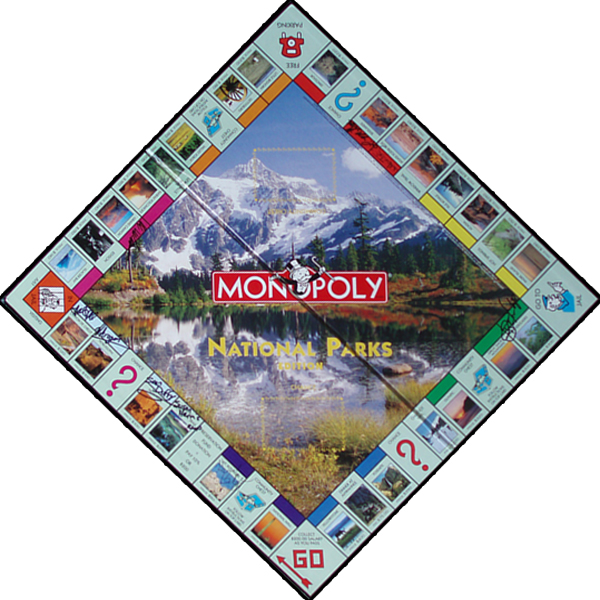
Isn’t it obvious? Traveling to the different parks on the National Parks Monopoly Board! Right? Sort of. Travel is one of the ways the objective is accomplished but it is not the main concept of this sight. Our main goal is “gaining life experiences”. This is not highlighted much at all in many of the stories. I hope to correct that with a little identifier on what new experiences occurred in each post.

What is meant by gaining life experiences and why is that important? Life experiences are responsible for who each of us is. Many people may share an experience even though each person has a unique perspective on that experience but no one else in the world has all of the same experiences during a life. It is that whole combination of experiences that help make each one of us an individual like no other. One of the best parts, we get to choose many of our life experiences!

Another Cruise?

People are very different in how they gain life experience. I like to learn about a lot of different things so I take on a hobby for awhile, learn a lot about it, and then go on to a different hobby. That’s why traveling to different locations fits me. I’ve been to Mazatlan Mexico five times. Mazatlan is a nice place and I really enjoyed it but the last time I was there it was not as stimulating for me because I have experienced it before. I don’t plan to return for awhile if ever. I want to experience some place different. The same thing with cruises. I’ve been on five of them and the last one just wasn’t as much fun. I likely will not go on another one for while (After this summer when we are taking a cruise to Alaska to see Glacier Bay National Park which is on our Monopoly Board).

These are all different ways of gaining life experience making each of us unique. Tough to gain life experience in bed or watching TV. Sure I like to take a break from gaining much experience once and awhile and watch a moving or two and take a nap on a rainy day. Who doesn’t?  Accomplishing a something new can be extremely simple such as a walk to a park. You may  noticing a bird you haven’t seen before or briefly observing kids playing a game or having a disagreement. BRIEFLY is key here as watching for too long could bring questions from the police.  Maybe you see an old friend or meet a new one. All can provide a new experience. In the photo below I had never witnessed hundreds of Robins clustered together like this before. A little research indicated that it is not a rare event further south.

Robins Congregating as Spring is Slow to Approach

We are in control of how we react to an experience and what we take away from it. Not all life experiences are positive ones. A loved one in the hospital or the passing of a pet. These are still new encounters and add to the total computation of life. Asking a few questions in your own mind or even writing them down helps you understand yourself further. Did you like this experience? Why or why not? What did you take away from it? Did you learn something new about yourself? It’s ok to laugh about having an ah hah moment. I find it very intriguing when I learn something new that I would never have imagined before about myself.

Let me provide a brief example. I don’t recall the exact place and time but I do remember the events and the enlightenment that followed. It had just finished raining and I went outside to work on some of the plants around the house. I’m a horticulturalist, it’s what I do. While walking under some trees I brushed against a branch and water rain over my head. It was just at that moment I realized I don’t like things dripping on my head unless I’m in the shower or swimming. There are more exceptions but in general I don’t like slow dripping liquids. Now it is my choice to not like slow dripping liquids on my head so it is also up to me to change that if I so desired. Not sure how but I’m confident I could. I also don’t know if this has been a life long thing or started recently. That doesn’t really matter to me.

This simple life experience provided insight into me. I learned something and didn’t intend to. We all have this ability. It just takes a conscious effort and willingness to do so. Each little experience leads to a lifetime of knowledge which is why life experience is so valuable and makes you unique.

Gaining Life Experience Through the Photography Experiment

Inspiration From Zach

I heard Zach Sobiech on the radio last year and was inspired. In brief, he was diagnosed with cancer early in life and given a short time to live. As a parting message he wrote a song which has been doing quite well – it’s called Clouds. This was kind of his way of saying goodbye. Unfortunately Zach passed on May 20,2013.

To see his story watch the video.

There are many stories of kids that are terminally ill and are difficult to understand and accept. There is inspiration in these stories. Inspiration for gratitude. Inspiration for those around you. The biggest piece of inspiration I received from Zach is to live! To me that doesn’t mean living on the edge and skydiving or swimming with the sharks. It means looking back on the day and finding those pieces of joy. Enjoying those your with that day even if they have done things that really irritate you and they do it every day. We all receive unwanted news and get angry or depressed. Feel it, embrace it, and move on. This doesn’t mean do it all in minutes. It could take days, weeks, or even months to move on. Just don’t let if affect you for years and years.

How often do you stop and ask during the day “Am I enjoying this?” It’s a valid question. What is interesting is the answers you begin to give yourself. Why are you or are you not enjoying this right now? Could you be? Should you be? Is there something that needs to be changed? What are the consequences of those changes? You realize you are in control of more than you thought and that can be invigorating.

Orchids - One of My Hobbies

For me, I enjoy learning and experiencing new things. I change hobbies somewhat frequently. It may be keeping fish for awhile and then moving on to orchids and then photography. With each hobby comes dedication to learning and expenses. Traveling to different destinations is my most impactful hobby. Sometimes those travels are costly and other times they are just a day trip with little cost. Traveling is not just about the destination, it’s about experiences and the people that I get to share those with.

Those I get to Travel With

Zach has re-inforced that the things I like to do are ok. It’s alright to keep learning and living. Changing hobbies every 3-5 years has become a little frustrating because of the time, energy, and money I put into them. While I learn a lot, I can never seem to become a master at any of them because I get bored with them. Maybe that’s what I’m really good at, learning. Zach’s message to live reminds me that is what I’m doing and what works for me.

Clouds

I hope Zach can be an inspiration to you also!

Metering Modes

Metering modes are not something that I have ever really played around with as I keep this set to pattern on my cameras which is the same as matrix or evaluative in Peter’s article on metering modes. I decided to play around with this a little to see what differences I could find. The different modes are only available with the aperture priority, shutter priority, program, and manual settings. I set the camera in aperture priority and kept the ISO at 1600. The camera was not on a tripod so each shot is slightly different which could account for some of the variation in these pictures. That being noted, here’s a few pictures:

DSC02751_thumb6DSC02752_thumb9

DSC02753_thumb8

The top left photo used spot metering while the top right photo used center weighted average and the photo to the left used pattern. I don’t see much of a difference in any of these that even at larger sizes. These were taken during the morning on a sunny day at close range possibly negating any difference in modes. These are daffodils emerging from their winter nap.

DSC027587_thumb9DSC027591_thumb3

DSC027601_thumb3

These photos are in the same order as the previous group with spot metering top left, center weighted average top right, and pattern metering on the left. As in the daffodil group above, I don’t see a lot of difference between modes. Again these were taken outside in the sun so the difference may be less noticeable if there is any.


DSC027621_thumb6DSC027631_thumb4

DSC027611_thumb6

These photos show more of a difference in modes most likely because of the distance between the foreground and background. The order is the same with spot metering top left followed by center weighted top right and pattern to the left. Both the spot and center weighted are focused on the pussy willows while the pattern focuses on the trees in the background. The spot metered picture is a little darker than the others with greater focus on the details of the pussy willow branch. Center weighted obviously let in more light making the whole photo brighter. The pattern photo is the brightest of the three modes due to the whole picture being weighted for light levels by the camera.

I didn’t see a lot of differences by changing the metering modes for photos shot closer to the subject but once you step back and take pictures of a larger area the differences begin to show up. There are plenty of situations to try this in to find the differences. Peter Carey gives a list on his metering modes page for which modes to use in which situations. Time to go learn more about taking photos. Fortunately many of the issues from incorrect metering can also be taken care of if editing with the exception of focus or too high and too low of an exposure.

Taking Time-Lapse Photos

Getting Setup to Take the Photos

This is how I set everything up to shoot a time lapse video before the snow started falling for one of our April snow storms. I plugged in the Arduino which is connected to a prototype board with the potentiometer on it which is connected the the shutterbug pro which is connected to the servo on top of the camera set to take pictures. I found an AC adapter around the house ( I knew I saved these things for a reason) that puts out 5 volts DC current which is perfect to power all of the boards and the servo. As a bonus the plug fits perfectly into the port on the Arduino board. Should be all ready to go now.

The AC Adapter

The next thing is to adjust the camera for taking the pictures. If it was left in automatic mode it would re-focus each time and set different shutter, aperture, and ISO for each shot. This takes time, energy, and changes how each picture looks so that there is a flicker appearance in a time-lapse. To help avoid this I set the camera on aperture priority with a setting of f2.8 so I could get as much light to the senor as possible because it was darker than normal with the heavy cloud cover and snowfall along with the day transitioning to night during the shooting time of over 8 hours. Also, the focus was set to manual and adjusted for further away. This saves power since the camera doesn’t have to focus for each picture and prevents it from transitioning the focus from the street to the glass in the window as night arrives since this all took place through the window. Here is the final video which lasts 24 seconds but taken over 8+ hours in time.

video
play-sharp-fill

Some points of interest. First, at about 5 seconds, if you’re lucky, you can see a pair of ducks venture into different yards for a few frames. Second, I used 25 frames per second which means that for every second of video there are 25 pictures. Calculating that out you get 600 pictures taken over the 8+hours which is 1 picture every 50 seconds. I used 8 hours because that’s how long the batteries lasted in the camera. Below are the first and last photo so you can compare the difference in light throughout this project.

First Photo of Time Lapse


Last Photo of Time Lapse

More Time-lapse Fun

Arduino with Shutterbug and Servo

While spending way too much time researching mechanical intervalometers (the device that takes pictures at a set interval) I came across a video that shows a shutterbug pro pre-built circuit board used to control a servo which mechanically presses the shutter button on any camera. While looking through the parts list and how this all works I came across a problem. You need another device to set the servo positions so shutterbug can operate the servo to those precise positions. The company that sells the shutterbug pro also sells a signal emulator which can position the servo. Do I really want to use something once that really has no other uses?

The Arduino with a Prototype Board

Of course not! Spending even more time I came across another video that shows how to use an Arduino micro computer and potentiometer to adjust the servo. In addition, once I’m done using it to set the servo positions for the shutterbug, I can learn simple programming to make the Arduino do other things if so desired. In addition I use the Arduino as a voltage regulator to the shutterbug. Are there a lot of terms here that are unfamiliar? I had that issue as well. I never really knew what a potentiometer was or how a servo works until researching it more just to do time lapse photography.

Everything Hooked up to the Camera

I do also want to try long exposures to capture star trails at some point which the shutterbug can do with some (suppose to be) simple programming. Although I have run into issues trying to re-program this board from time to time for different interval shooting and to change it to hold for long exposures. With enough messing around I do eventually get it to do what I want. Make sure everything is working well before the desired photography session begins. It has taken me up to 30 minutes to get the board and servo set up. In addition, it takes some tinkering to get the servo to consistently push the shutter button on the camera.

Some of the Tinkering

As you can see in the photo above I needed to add some extra equipment to make this work flawlessly. I have the servo attached to the camera with a velcro strap. Just this didn’t work well because I could not get it tight enough to actually push down the button on the camera. That’s where the close pin comes in. I use one or two to make the velcro tight enough to get the servo to press the button depending on how tight I get the velcro to start with. Also, I added a rubber band to the servo because it kept sliding around on top of the camera over time preventing it from taking photos after awhile. One last modification was the addition of electrical tape to the servo arm as it would scratch the button after a number of pictures.

Next up….. taking the actual pictures.

The Winter Blues

More Snow ?!

Well, for some of us it seems winter just does not want to leave. Usually by now we can start to see life beginning to return outside. As I write this the snow is falling once again. What can be done to avoid the winter depression that so many are experiencing right now? For me it’s enjoy the orchids that are putting on a wonderful display.

Maxilleria Orchid

Personally, I’m sick of wearing winter clothes – especially jackets. Shorts and T-shirts are my preference. At least while at home the orchids are showing their spring blooms. Early in the winter they didn’t look very good but thankfully pulled out of it and starting growing again. I continue to learn about different orchids and their care requirements in my house and they are rewarding the efforts now.

White Knight

I’m still trying to figure out how to get the lady slipper orchids and phragmipedium orchids to bloom. There are some that have never bloomed as they were purchased as seedlings so I don’t know what they look like. Guess I’ll have to concentrate harder on these.

Purple Phalaenopsis

For now, enjoy some pictures of these beautiful orchids.

Phalaenopsis

Time-lapse Photography

Ice Skating Time Lapse

Well, it’s been a few weeks since I’ve put together a post so what have I been doing? Other than taxes? Ya, that takes a little time, along with shredding documents that have accumulated over the past year that don’t need to be saved. I’ve been going through a few more properties on the photography experiment board such as Shutter Speed, Aperture, ISO, and Photography Jargon as well as reading a book or two on photography. The photography jargon helped explain a few terms for me so I can understand them better. A worth while post to read. I couldn’t think of anything to write about regarding these and I’ve already completed the experiment recommended by Peter Carey covering these topics so there haven’t been any post recently.

One thing I’ve been thinking about lately is how to take time lapse photos. Using my point and shoot camera which was recently fixed, you can see that post here…, I tried it out just using the remote that came with the camera taking a photo as soon as the camera was finished processing each shot. There ended up being over 300 pictures taken over 30 minutes which ended up providing a 10 second time-lapse video. That was fun but how can I make a 4-5 minute time-lapse video using this technique? Through some research I found the Tempus time-lapse remote to take pictures every few seconds. Problem solved, let’s order one.

video
play-sharp-fill

Wait a minute! That will work for my point and shoot but what about the new Sony Nex 3 which does not have remote functions. When I purchased this camera I didn’t think the remote was very important since up to this point I never used it on other cameras. What that ever a wrong assumption now that I have a camera capable of shooting good nighttime photos. Who knew? Well, Tempus also comes with a mechanical trigger but at a much higher cost. Could there be another way? Through more time and research I came across ways to build my own mechanical time-lapse trigger which was a little more adjustable and would work on all of my cameras with considerably less cost.

Shutterbug Pro Circuit Board

Finally I settled on the Shutterbug Pro which combined with a servo will take pictures at set time intervals. This is able to take extended photos in the bulb setting on dSLR cameras in order to capture light trails and star movement over time which I do want to try. Also, I get to build something and learn how to use things I’ve never used before. Learning is usually the best part for me and successfully using that knowledge. More new experiences!

Hobby Servo

I’ll put up another post explaining how I did this later. To see that post click here….

To see the video created from this project click here….

The Exposure Triangle

Smallest Aperture

Continuing on with my determination to learn how to better use my camera, I took on a few experiments recommended by Peter Carey in his post about Exposure. The first one involves changing Aperture from the lowest aperture to the highest. On my camera that involved 6 different photos. My apologies as the lighting is not great for these photos but the basic idea still comes through.

Middle Aperture

In the top photo the background is completed blurry and the shutter speed was the slowest. As I progressed through each level I noticed two things happening. First, the shutter speed decreased as I moved the aperture higher. This is in response to the camera letting in less light (larger aperture) requiring a longer exposure to capture the elements in the photo to offset the smaller opening. Second, more and more of the background came into focus. You can see the difference in focus from the top photo to the bottom one. This must be what they call depth of field and what is meant by losing depth of field as the aperture increases. Nice experiment Peter!

highest aperture

The next experiment was with ISO. Keep aperture steady and increase ISO and see what happens. This took 8 photos for me to run through the available ISO range on my camera ranging from 200 to 16,000.

Lowest ISO

In the top photo the clarity is pretty good as this photo is magnified somewhat. Again as the ISO is increased the shutter speed changed. The higher the ISO the faster the shutter opened and closed to compensate for the sensitivity to light as affected by the changing ISO. As I moved to the middle of the ISO range you can see the graininess appear more in the picture below.

Middle ISO

Moving to the lower picture the graininess is really noticeable, especially on the white and black objects. Before understanding how the exposure, aperture, and ISO work together better, I used the exposure setting on my camera to change the picture not realizing that all that was doing was changing one or more of these settings. I thought it was a separate setting altogether. I’m gaining a clearer idea of how each of these can be used to change the look of a photo. A few thousand more photos changing the exposure settings and I should start to get a feel for which to adjust in different situations.

DSC01911

Fixing a Digital Camera

A Dusty Lens Ruining the Sunset

One of the reasons we replaced our old camera ( an Olympus C-750) was because there was dust particles on the lens. In the photo above you can see one of the particles just above the sun. This lens is sealed and requires taking the entire camera apart which is why this hasn’t been done until now. There are other reasons we upgraded cameras but this was the catalyst that dictated when.

The Camera's Been Dismantled

I’ve been known to dismantle electronics before and get them back together successfully most of the time so why not give a digital camera a try. How hard could it be? Besides I came across a website with information on cleaning the lens on a similar camera to this one with nice pictures and everything. Didn’t look to terribly difficult. After some searching for a few screws I managed to get it apart without breaking anything as you can see in the photo above. That’s always a good start. There were 4 screws that hiding making it a bit of a challenge but once I found them all went pretty well. The lens is that black tube with some ribbons coming out of it.

Getting It Back Together

After some thorough but gentle cleaning I got it all back together. Now the final test is does it all work. The photo below was taken with this camera and there is no more dust visible on the lens. It may have taken a couple of weekends to accomplish the cleaning but I learned a lot about point and shoot cameras along with more capabilities that I didn’t know this model has. I always knew it was a good camera but there’s more versatility than I ever imagined using the manual modes. Certainly not SLR quality but better than most point and shoot cameras.

No More Dust